Tickets and access control
Understand ticket PDFs, choose scanners and check tickets at the entrance.
Last updated 7 days ago
Tickets and access control
After paying, customers receive a PDF ticket by email. If they ordered multiple tickets, they also receive one PDF containing all tickets, each on a separate page so they can print and distribute them.
Example ticket
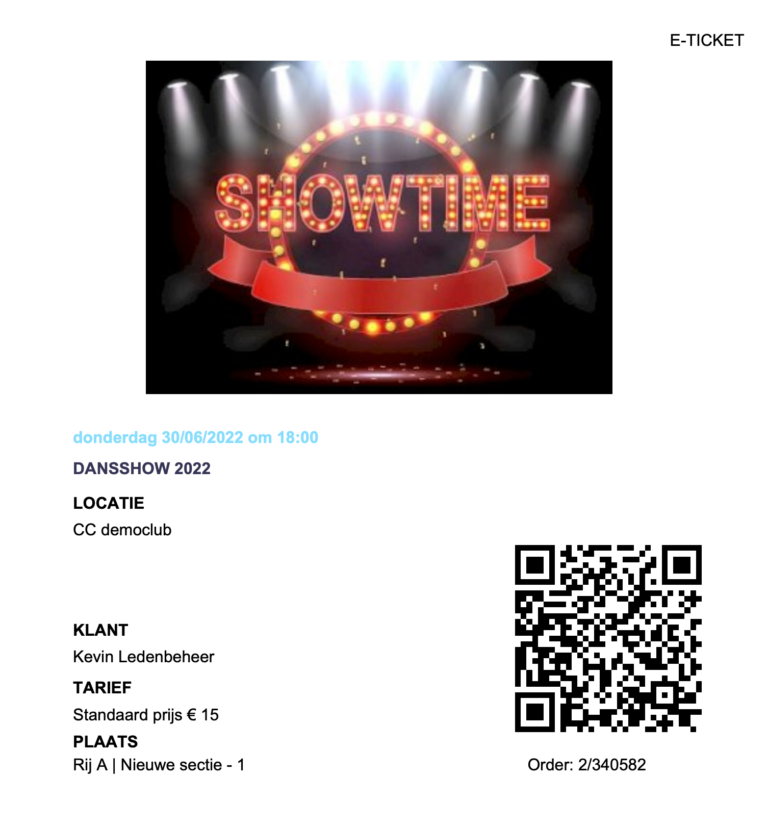
A ticket contains the following information:
Event image
Date and time
Location
Name of the customer who bought the ticket
Selected price category
Seat number (if a seating plan is used)
QR code to scan at the entrance. The order number appears below the code so you can find it in your cost notes.
Scan tickets at the entrance
Which devices can scan tickets?
You can scan tickets with a smartphone or tablet that has a camera and QR code support. Newer devices usually include this in their camera app; older devices may need a free QR code reader from the app store.
How do you choose who may scan tickets?
In the event settings, select the people who may scan tickets.
How does it work?
Open the camera app on your device (or a QR code reader).
Point the camera at the QR code.
Open the link that appears. You will be asked to sign in to Ledenbeheer if you are not already signed in.
You will immediately see confirmation that the ticket was scanned successfully.
Frequently asked questions
Can a ticket be scanned twice?
Can a ticket be scanned twice?
No. The second attempt shows an error saying that the ticket has already been scanned.
What messages might appear while scanning?
What messages might appear while scanning?
'Something went wrong while signing in. Please try again.'
'Your event was not found.'
'You do not have permission to scan tickets for this club.'
'Seat could not be found.'
'This ticket was already scanned by "user name" on "date".'
'This ticket can be scanned from "date" to "date".'
'Ticket was scanned successfully for event "event name" on "date".'
Still need help? Ask the team